Thursday, May 22, 2014

Jpeg vs Raw

So two years ago I had no clue what the word RAW was in terms of photography.  Just getting a nice camera I turned it on & took pictures.  Have always loved taken pictures of my family & never imaged doing this as a job.  Here I am two years later learning something new everyday and wanted to share the one thing I really learned the benefits of shooting in RAW over the last 6 months.    I spent so much time learning shutter speed, fstop that I never stopped to learn how all that would be better if I switched to shooting RAW images.  

There is no doubt that DSLR cameras have changed the way photos are taken in drastic ways. Film count is no longer an issue, and the photographer gets instant feedback. In mom terms, when the photographer presses the shutter button, the sensor in the camera records what it sees as data, and then converts it into a workable file, such as a JPEG . While this makes the file incredibly compatible, it makes true adjustments to the image difficult. The RAW format, on the other hand, is essentially a digital negative that can be edited by many programs, including Photoshop. 

I edit in Photoshop but so many other photo editing software that can be used.  


  1. Import your photos onto your computer
  2. Open Photoshop, then open the RAW file you want to edit. (Camera files are usually labeled sequentially; raw files will end in CR2. An example file will look something like "IMG_101.CR2." Once you have pressed Open, your image should open in a new Camera Raw window.
  3. Adjust the sliders before you according to your preference. Settings such as exposure, shadows, white balance, saturation and contrast can all be tweaked. All changes are shown in the preview window.
  4. Press "Open" once again after you are satisfied with your settings. This concludes the Raw portion of tweaking and brings your photo into the typical Photoshop Elements environment. 


  • Your camera may not be shooting in Raw by default. How to change this setting varies from camera to camera, but your manual should specify how to do this.
  • Save your Raw files in a different location than that of your finished files so as to retain a copy of the original shot. 
  • Save your edited file as JPEG
  • Raw formatted files are much larger than compressed shots. If you have a small hard drive, be wary of the large file size.  I purchased a external hard drive that holds my images to free up my computer hard drive.  Also purchased a large SD card at least 8GB or larger.  
  • Camera is capable of shooting in RAW & JPEG
  • You do not have to shoot in Manuel to shoot RAW.  
So this is why I shoot in RAW vs JPEG.  JPEG is great for quick images on a day to day starting out.  The camera does all the work and for the most part does a great job thinking for you.  But sometimes an image might be something you would of really liked had it not been so blown out from the sun.

The before image below is JPEG shoot in Manual Camera mode. This is not horrible but not what was shoot based on the camera settings.  

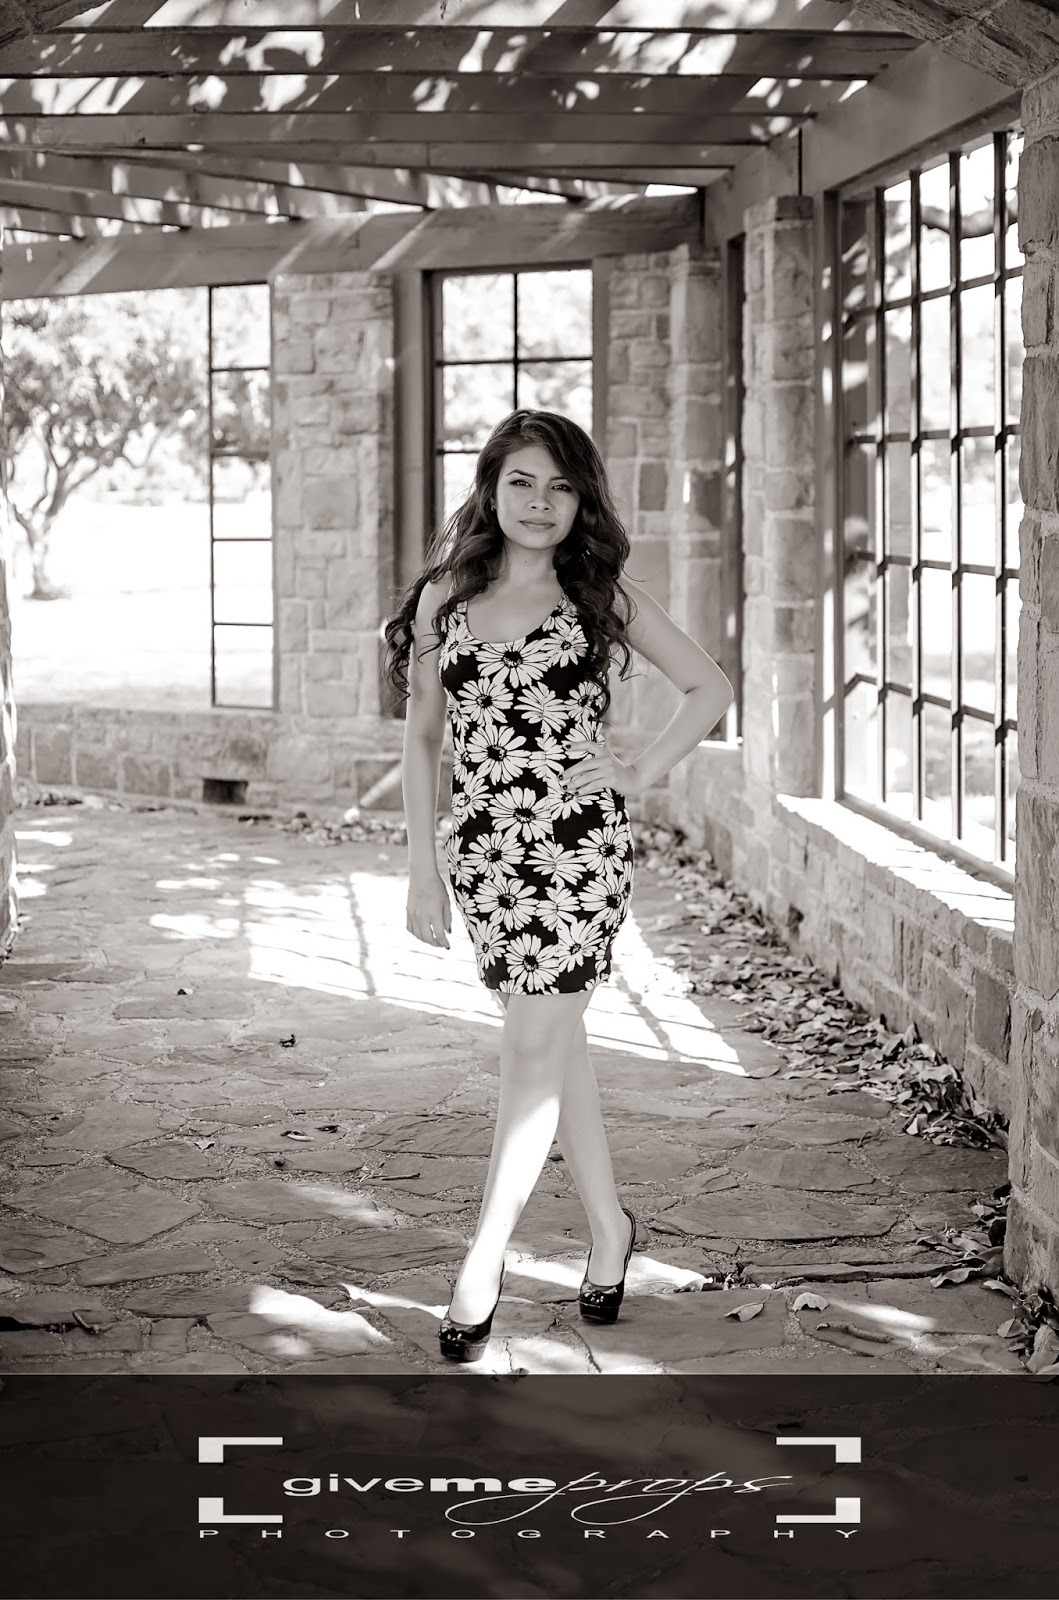
The After is the RAW image edited in Photoshop.
Lots of youtube & sites to help make the switch from JPEG to Raw so easy. I Hope to keep on learning and getting better each day!

2014 Senior - Dallas/Oak Cliff, Texas


Got to spend the day with this stunning 2014 Senior in the Bishop Arts Area.  She was so much fun & a natural. 

Please remember do not download, crop or alter. 
If you like my photography please like my page Give Me Props 

Tuesday, May 6, 2014

Mini Portrait Session Dates

Have had a few inquires about mini portrait session dates that will be coming up this year.  

Mini portrait session are kid sessions but will have family sessions during the holidays.  

All Mini Portrait Sessions are professional styled session with hand picked vintage props to create custom photography; this is an investment and I do take pride in creating the highest quality experience and images.

Mini Portrait Sessions Included:  Only $125

  • 20 Minute Session time
  • Online gallery to view 10-15 images to pick your favorite 5 hi-resolution images to download 
  • 1 8x10
  • 2 5x7
  • 8 Wallets 

Mini portrait sessions require a $50 non-refundable retainer to hold the date.    An email will be sent out 1 weeks prior to the session date. Email will have directions, as well as serve as a reminder of your date and time. Balance is due at the time of session. When I open dates for mini sessions I am taking on a large number of sessions in that time period, on top of my regular schedule. Because of this, in order to stay as organized as possible and fair to everyone, once you book a time slot, I’m not able to change times or days. Thank you for your understanding! Retainers are always non-refundable.


  • Indian & Princess Summer Mini Portrait Session - Saturday June 21st (6 time slots available)
  • Back to School - Weekends in September (4 slots per weekend)
  • Christmas Family Mini Portrait Sessions - Weekends November & December (4 slots per weekend)


(summer sessions are in the evening for best lighting and not to be to hot for the kids.)


    Sunday, May 4, 2014

    The end of the NICU Journey & a families happly ever after


    Got the pleasure of spending some time with this family the night before they brought home sweet baby Asher after 7 weeks in the NICU.  Then got to spend Saturday with the whole family to capture the first family portraits for them!

    2014 Byron Nelson Senior


    Friday, May 2, 2014

    Class of 2014 Senior

    So apparently it's been a year since I did my first session.

    Since then I have attended lots of workshops, read lots of book & become obsessed with all things photography!

    Here's a little peek into how my second year is starting with some of the Class of 2014